Pagina 10 di 20 PrimaPrima ... 89101112 ... UltimaUltima
Risultati da 91 a 100 di 196

Discussione: " Moda bimbi da 0 a 3 anni..."

  1. #91
    Nick-name Guest

    Predefinito

    Baby Pullover Sweater Crochet Pattern from Caron Yarn | FaveCrafts.com#


    MATERIALS: 6 months (12 months, 18 months, 24 months)
    • Caron International's Simply Soft Baby (100% acrylic; 2 oz/56.7 g, 95 yds/87 m ball): #0006 Cool Mint 8 (8, 10, 10) oz/ 226(226, 283,283)g
    • One size US G-6 (4 mm) crochet hook, or size to obtain gauge
    • One size US H-8 (5 mm) crochet hook
    • Yarn needle

    FINISHED MEASUREMENTS: 6 months (12 months, 18 months, 24 months)

    Chest 20 (21, 22, 23)"/51 (53.5, 56, 58.5) cm
    Length 10 1/2 (11, 11 1/2, 12 1/2)"/26.5 (28, 29, 32) cm


    GAUGE
    In stitch pattern, using G-6 (4 mm) hook, 17 sts and 16 rows = 4"/10 cm.

    STITCHES USED
    Chain (ch)
    Single crochet (sc)
    Slip stitch (slip st)

    SPECIAL TERMS
    sc2tog: Single crochet 2 together – Insert hook in next stitch, yarn over and pull up a loop, (2 loops on hook), insert hook in next stitch, yarn over and pull up a loop, yarn over and draw through all 3 loops on hook.
    fl-sc: Front loop single crochet – Sc in front loop only of indicated stitch.
    bl-sc: Back loop single crochet – Sc in back loop only of indicated stitch.

    STITCH PATTERN (worked over an odd number of stitches)
    Row 1: Sc in second ch from hook and in each remaining ch across, turn.
    Row 2: Ch 1, fl-sc in first st, *bl-sc in next st, fl-sc in next st; repeat from * across, turn.
    Repeat Row 2 for Stitch Pattern.

    NOTE
    To maintain Stitch Pattern during garment shaping, always work in the front loop of fl-sc sts and in the back loop of bl-sc sts.

    BACK
    Rolled Hem
    With larger hook, chain 44 (46, 48, 50).
    Row 1: Slip st in second ch from hook and in each remaining ch across, turn—43 (45, 47, 49) sts.
    Rows 2–7: Ch 1, working in back loops only, slip st in each st across, turn.
    Fold piece lengthwise, bringing Row 1 up to align with sts of Row 7.
    Row 8: Ch 1, working through both thicknesses, *insert hook in unused loop of next st of Row 1 and in the front loop of next st of Row 7, yarn over and draw through all loops on hook (making a slip st); repeat from * across, turn.
    Change to smaller hook, tighten loop on hook slightly.
    Body
    Row 9: Ch 1, bl-sc in each slip st across, turn.
    Row 10 (RS): Ch 1, work Row 2 of Stitch Pattern.
    Continue even in Stitch Pattern until piece measures 5 3/4 (6, 6 1/4, 7)"/14.5 (15, 16, 18) cm from beginning (including rolled hem).
    Shape Armholes
    Row 1: Ch 1, slip st in first 2 sts, ch 1, work in Stitch Pattern across to last 2 sts; leave last 2 sts unworked, turn—39 (41, 43, 45) sts (excluding slip sts).
    Row 2: Ch 1, sc2tog, work in Stitch Pattern across to last 2 sc, sc2tog, turn—37 (39, 41, 43) sts.
    Continue even in Stitch Pattern until armhole measures 4 1/4 (4 1/2, 4 3/4, 5)"/11 (11.5, 12, 12.5) cm from beginning of armhole shaping.
    Shape First Shoulder
    Row 1: Ch 1, work in Stitch Pattern over first 8 (8, 9, 9) sts; leave remaining sts unworked, turn—8 (8, 9, 9) sts.
    Row 2: Ch 1, sc2tog, work in Stitch Pattern across, turn—7 (7, 8, 8) sts.
    Fasten off.
    Shape Second Shoulder
    Sk 21 (23, 23, 25) unworked sts following first shoulder; join yarn with slip st in next st.
    Row 1: Ch 1, work in Stitch Pattern in same st as join and in each remaining st across, turn—8 (8, 9, 9) sts.
    Row 2: Ch 1, work in Stitch Pattern to last 2 sts, sc2tog—7 (7, 8, 8) sts.
    Fasten off.

    FRONT
    Work as for Back until piece measures 8 1/2 (9, 9 1/2, 10)"/21.5 (23, 24, 25.5) cm from beginning (including rolled hem)—37 (39, 41, 43) sts.
    Shape First Neck Edge and Shoulder
    Row 1: Ch 1, work in Stitch Pattern over first 13 (13, 14, 14) sts; leave remaining sts unworked, turn—13 (13, 14, 14) sts.
    Row 2: Ch 1, slip st in first 5 sts, ch 1, work in Stitch Pattern across, turn—8 (8, 9, 9) sts (excluding slip sts).
    Row 3: Ch 1, work in Stitch Pattern across to last 2 sc, sc2tog, turn—7 (7, 8, 8) sts.
    Continue even in Stitch Pattern until armhole measures same as Back armhole. Fasten off.
    Shape Second Neck Edge and Shoulder
    Sk 11 (13, 13, 15) unworked sts following first neck edge; join yarn with slip st in next st.
    Row 1: Ch 1, work in Stitch Pattern in same st as join and in each remaining st across, turn—13 (13, 14, 14) sts.
    Row 2: Ch 1, work in Stitch Pattern over first 8 (8, 9, 9) sts; leave remaining sts unworked, turn—8 (8, 9, 9) sts.
    Row 3: Ch 1, sc2tog, work in Stitch Pattern across, turn—7 (7, 8, 8) sts.
    Continue even in Stitch Pattern until armhole measures same as Back armhole. Fasten off.

    SLEEVE (make 2)
    With larger hook, chain 28 (30, 32, 34).
    Rows 1–10: Work as for Rows 1–10 of Back—27 (29, 31, 33) sts.
    Row 11 (increase row): Ch 1, 2 sc in first st, work in Stitch Pattern across to last sc, 2 sc in last sc, turn—29 (31, 33, 35) sts.
    Rows 12–15 (16, 16, 17): Work in Stitch Pattern.
    Row 16 (17, 17, 18): Repeat Row 11—31 (33, 35, 37) sts.
    Repeat last 5 (6, 6, 7) rows 3 more times—37 (39, 41, 43) sts.
    Continue even in Stitch Pattern until piece measures 6 1/2 (7 1/2, 8, 8 1/2)"/16.5 (19, 20.5, 21.5) cm from beginning (including rolled hem).
    Shape Sleeve Cap
    Row 1 (decrease row): Ch 1, sc2tog, work in Stitch Pattern across to last 2 sts, sc2tog, turn—35 (37, 39, 41) sts.
    Rows 2–8 (9, 10, 11): Repeat Row 1—21 (21, 21, 21) sts.
    Fasten off.

    FINISHING
    Sew shoulder seams.
    Rolled Collar
    Row 1: With RS facing and larger hook, join yarn with slip st in either shoulder seam; work slip st evenly around neckline; do not join, turn.
    Rows 2–5: Ch 1, working in back loops only, slip st in each st across, turn.
    Fold collar down lengthwise, bringing Row 5 down to align with sts of Row 1.
    Row 6: Ch 1, working through both thicknesses, *insert hook in unused loop of next st of Row 1 and in the front loop of next st of Row 5, yarn over and draw through all loops on hook (making a slip st); repeat from * across.
    Fasten off. With yarn needle, carefully seam beginning and ending edges of the collar together.
    Set in sleeves. Sew sleeve and side seams. Weave in all ends.


    1 inc = 2,54 cm

  2. #92
    Nick-name Guest

    Predefinito

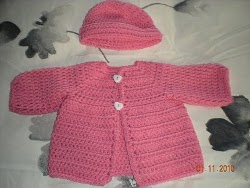
    Sweater Coat | AllFreeCrochet.com
    Bella Bambina: Sweater Coat


    TOP DOWN UNCINETTO
    Taglia 0-3 mesi

    campione 4 maglie x 2 righe 2,54cm
    lane e uncinetto 4 mm

    pa = punto alto
    bv = punto basso
    cat = catenella

    Montare 36 cat
    g1 = 1 pa, nel 4^ punto dall'uncinetto e nei seguenti 3 punti, 3 pa nello stesso punto, pa nei prossimi 5 punti, 3 pa nello stesso punto, pa nei prossimi 10 punti, 3 pa nel punto seguente, pa nei prossimi 5 punti, 3 pa nello stesso punto, pa negli ultimi 5 punti, 2 cat, girare
    g2-5 = pa in ogni pa, 3 pa al centro di ogni gruppo di pa, 2 cat, girare

    Formare il giro manica (ascella)
    Bella Bambina: Armhole Tutorial qui il tutorial molto chiaro

    g6 = pa fino al centro del primo gruppo di pa, 4 cat, saltare i successivi 3 pa, 1 pa al centro del gruppo di pa, 4 cat, saltare 3 p, 1 pa al centro del gruppo di 3 pa, pa fino alla fine del giro, 1 cat, girare

    g7 = pb per tutto il giro, 1 cat, girare
    g8 = *pb nei prossimi 2 punti, 2 pb in un punto * ripetere per tutto il giro, terminare con pb negli ultimi 2 p, 2 cat, girare
    g9-19 = pb per tutto il giro, 2 cat, girare
    g20 = pb per tutto il giro

    Quindi 1 cat, pb sul bordo frontale, 3 pb nel punto d'angolo, pb intorno al collo, 3 pb nel punto d'angolo, pb sul bordo davanti sinistro facendo le asole che si desiderano, 3 pb nel p d'angolo, pb sul bordo inferiore, 2 pb nell'ulti p d'angolo, fermare il filo e tagliare.

    Manica
    Attaccare il filo a metà dell'ascella,
    g1-9 = 2 cat, pa in ogni punto lavorando in tondo.
    g10 = 1 cat pb in ogni punto lav in tondo, tagliare il filo.
    Ultima modifica di Nick-name; 05-08-2011 alle 20:30 Motivo: correz ortogr

  3. #93
    Nick-name Guest

    Predefinito

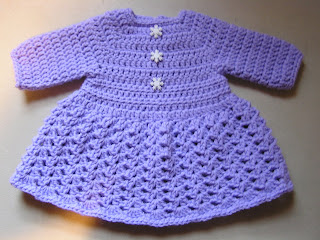
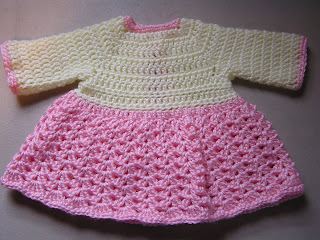
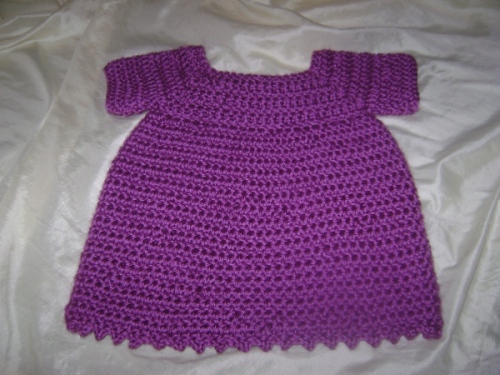
    Bella Bambina: Sweater Dress Pattern


    This dress should fit a 6-8 lb newborn baby.

    The Lavender dress is made with Pound of Love yarn, and the other is made with Simply Soft yarn
    in Off White and Soft Pink.

    G7 hook
    light WW yarn such as Simply Soft or Pound of love.

    Bodice-
    Ch 36

    row 1: DC in 4th CH from hook and next 3 chs,
    3DC in next ch,
    DC in next 5 chs,
    3DC in next ch,
    DC in next 10 chs,
    3DC in next ch,
    DC in next 5 chs,
    3DC in next ch,
    DC in last 5 chs. Ch 2, turn.

    rows 2-5: DC in each DC across, putting 3DC in center DC of 3 DC group below.
    Ch 2, turn.

    row 6: DC across to center of first 3dc group, ch 4, dc in center of second 3dc group,
    DC across to center of third 3dc group, ch 4, DC in last 3dc group, DC to end.
    Ch 1, turn.

    Click here to see pictures of how to make armholes (row 6)


    rows 7-10: HDC in first st and each st across. Ch 1, turn.
    Join at end of row 10. edited 9/19 to add: Do not Chain 1 at the end of row 10. When you

    get to the end of the row just join to first hdc of row 10.

    Skirt- worked in rounds

    round 1: Ch 2, DC in same st, *DC in next st, 2DC in next st* around. End 1dc in last
    st.

    round 2: Ch2, DC, ch1 , 2dc in joining st. *skip 2 sts (2dc, ch1, 2dc)in next st*
    around. Join to ch2 of first shell.

    rounds 3-10: sl st to ch1 sp, (ch2,dc, ch1, 2dc) in ch1 space. (2dc, ch1, 2dc) in each
    ch 1 space around. Join to ch 2 of first shell.

    round 11: sl st to ch1 space, (ch 2, 4dc) in space. Work 5dc in each space around, join.

    round 12: ch 1, sc in each dc around. join, finish off.

    Sleeves-
    Attach yarn at middle st under arm.

    rows 1-8: Ch 2, DC in each st around, join.

    row 9: ch1, sc in each st around, join. finish off.

    Back and neck trim-

    Join yarn in the back opening of the left side, ch1, sc up the side, 3sc in corner, sc around neck,

    3sc in corner, sc down right side placing 2 buttonholes evenly spaced.
    finish off.

  4. Per questo Post, l'utente Nick-name e' stato ringraziato da:

    criwich (24-02-2015)

  5. #94
    Nick-name Guest

    Predefinito

    EZ’s Baby Surprise Jacket modified for crochet « Where is she now?


    Abbreviations:
    ch: chain
    sc: Single crochet (US terminology)
    sc3tog: single crochet 3 together (used for decrease, explained below)
    sk: skip (leave unworked)
    st: stitch
    yo: yarn over the hook
    I made my prototype BSJ with a baby weight acrylic yarn. It is my suspicion that you could use any yarn that gives you what I’d like to call a “square gauge”. That is, your swatch must give you N sc x N rows = 1″. So you can use whatever yarn and hook gives you those numbers. I am no designer, so I hope this works for you.
    Since the single crochet stitch is squarer than the garter stitch which Ms Zimmermann uses, we are using James G Davis’ stockinette version as our basis for the crochet BSJ. The shaping (increase/decrease) is therefore distributed over 4 rows, the first 3 of which make changes, while the 4th is worked even (1 sc in each st).
    For decreasing, I’ve used sc3tog, which is worked as: (hook through next st, yo and pull loop through) 3 times, yo and pull through all four loops on hook (2 stitches decreased).
    For increasing just do 3 scs in one stitch.
    When increasing/decreasing, remember to place the 3sc in one/sc3tog in the increase/decrease stitch of the previous row. If the previous row was worked even, then your shaping will be placed into the sc immediately above the increase/decrease in the row below it. You could use a spare bit of contrasting yarn to mark your shaping points if it will make it easier to spot them. Going into the exact stitch is important if you don’t want a misshapen end result!
    With the hook and yarn appropriate for the size you want to make, chain the number of stitches EZ asks you to cast on, plus 1.
    Decrease section
    Pattern rows – Decrease:
    Row 1 Work even, turn
    Rows 2-4 ch 1, work number of stitches specified in pattern, sc3tog, work middle section over number of sts specified in pattern, sc3tog, sc to end, turn
    Rows 1-4 Work Pattern Rows 1-4 once
    Rows 5-6 Repeat Pattern Rows 1-2, working Row 7 as follows.
    Row 7 (2 sc, sc2 in next st) 9 times, 3 sc, sc3tog, work middle section, sc3tog, (2 sc, sc2 in next st) 9 times, turn (for the flare in the sleeves)
    Row 8 Repeat Row 4
    Repeat Decrease Rows 1-4 until you have the number of stitches at which you must begin to increase.
    Increase section
    Pattern rows – Increase
    Rows 1-3 Ch 1, sc upto the the stitch which was your last decrease stitch (if your last row was an evenly-worked row, this will be the stitch worked into the previous row’s sc3tog), 3sc in next st, work even up to next decrease, 3sc in next st, sc to end, turn.
    Row 4 Work even (ch 1, sc in each st to end).
    Work Increase Rows 1-4 until you have the number of stitches at which you need to make the back flare. Work the next row as follows:
    Back flare row Ch 1, sc to point of increase, 3sc in next sc, (4 sc, sc2) 10 times, 4 sc, sc to end, turn.
    Return to the increase rows and work until you reach the number of stitches for the neck bindoff.
    Work Neck Bindoff as follows:
    Neck Bindoff sl st to 6th sc, sc to increase point, 3sc in next st, work middle section up to next increase point, 3sc in next st, sc to 5 sts before the end, turn, leaving remaining 5 sts unworked. (5 sts unworked on either side)
    From now on, the shaping happens every alternate row. So you will work increases in one row, and work the next row even.
    Modified shaping rows
    Row 1 Ch 1, sc up to increase point, 3sc in next sc, work even up to next increase point, 3 sc in next sc, sc to end, turn.
    Row 2 ch 1, sc in each st to end, turn
    Continue with modified shaping until you reach the number of stitches required for the back extension. Work back extension as follows:
    Back extension
    Row 1 Cut yarn, sk all sts up to the increase point, join yarn at increase point, ch 1, sc in each sc up to next increase point, turn, leaving remaining sts unworked. (You will have left an equal number of stitches unworked on either side).
    Work 14 rows even.
    Button Band
    Cut yarn, return to the edge of the work (where you left your stitches unworked), join and work over the unworked sts, wortk 10 sc evenly up the sides of 14 rows, sc across the top of the extension, work 10 sc evenly down the sides of 14 rows, work the remaining unworked stitches. Make sure you now have the number of stitches as mentioned in the knit version to work the button band.
    Return to working the modified shaping rows, until you reach the number of stitches at which to place your buttonholes. Work buttonholes as follows:
    Buttonhole row Ch 1, 4 sc, (ch1, sk1, 8 sc)4 times, ch1, sk1, 6 sc, 3sc in next st, sc up to next increase point, 3sc in next sc, 6 sc, (ch1, sk1, 8 sc)4 times, ch1, sk1, sc to end, turn. (buttonholes are worked on both fronts, you can sew the buttons as per the gender of the baby over the ones which are not required, and use the holes on the other edge)
    Next row Ch 1, work even, making 1 sc in each ch1 space of the previous row.
    Return to working modified shaping rows until you reach the final count of stitches. Following the diagram, fold the sweater and sew shoulder seams and buttons.
    If you like, you can extend and shape the sleeves further as follows (in a contrasting colour if you like):
    Joining yarn on the other side of the starting chain, work 4 rounds of sc, 1 round with a few stitches decreased evenly, 2 rounds sc, one further decrease round. Fasten off and weave in all ends.
    At this point, I have not worked out a collar. You could neaten the neck edges by work a row of sc all around it in a contrasting colour, to add some interest.

  6. #95
    Nick-name Guest

    Predefinito


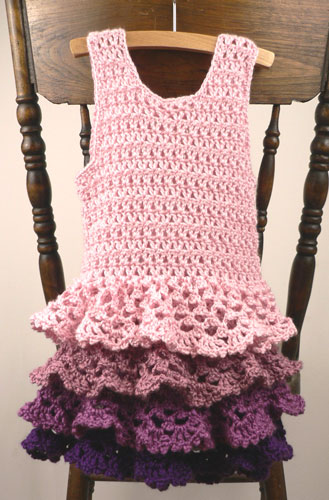
    Caron International Yarns and Latch Hook Kits
    SIZES
    Girls 3-4 (6, 8-10) years

    FINISHED MEASUREMENTS
    Chest 24 (26 1/2, 29)"/61 (67.5, 73.5)cm
    Length 21 (23, 25)"/53.5 (58.5, 63.5)cm, including ruffles


    MATERIALS
    Caron International's Simply Soft Brites (100% Acrylic): 8 (10, 12) oz (A), 3 (4, 5) oz (B), 3 (4, 5) oz (C)
    Caron International's Simply Soft (100% Acrylic): 2 (3, 3) oz (D)
    Colorway 1: #9604 Watermelon (A); #9605 Mango (B); #9606 Lemonade (C); #9701 White (D)
    Colorway 2: #9719 Soft Pink (A); #9722 Plum Wine (B); #9723 Raspberry (C); #9738 Violet (D)
    One size US H-8 (5mm) crochet hook, or size to obtain gauge.
    Yarn needle

    GAUGE
    In V-st pattern, 13 V-sts and 16 rows = 8"/20.5cm

    STITCHES USED
    Chain (ch), double crochet (dc), single crochet (sc), slip stitch (sl st)

    SPECIAL TERMS
    dc2tog: Double crochet 2 together—[Yarn over, insert hook in next st and draw up a loop, yarn over and draw through 2 loops] twice, yarn over and draw through all 3 loops on hook.
    picot: Ch 3, sl st in top of sc just made.
    V-st: V-stitch—(Dc, ch 1, dc) in indicated stitch or space.

    NOTE
    Dress is made in two pieces, front and back. After the front and back are seamed, ruffles are worked around the skirt.

    FRONT
    Beginning at lower edge, with C, ch 73 (79, 85).
    Row 1 (RS): Dc in 5th ch from hook (beginning ch and first dc count as first V-st here and throughout), *sk next 2 ch, (dc, ch 1, dc) in next ch (V-st made); repeat from * across to last 2 ch, ch 1, sk next ch, dc in last ch, turn—23 (25, 27) V-sts.
    Rows 2–4: Ch 4 (counts as dc, ch 1, here and throughout), dc in first dc (V-st made), *sk next dc, sk next ch, V-st in next dc (2nd dc of V-st); repeat from * across to last V-st, sk next dc, sk next ch, dc in last dc (3rd ch of turning ch), turn; change to B in last st of Row 4.
    Rows 5 and 6: With B, repeat Row 2 twice.
    Rows 7 and 8 (decrease rows): Ch 3 (does not count as a st here and throughout), sk first 2 dc, sk next ch (decrease made), V-st in next dc, *sk next dc, sk next ch, V-st in next dc; repeat from * across to last V-st, sk next dc, sk next ch, dc in last dc, turn; change to A in last st of Row 8—21 (23, 25) V-sts at the end of Row 8.
    Rows 9–12: With A, Ch 4, dc in first dc, *sk next dc, sk next ch, V-st in next dc; repeat from * across to last V-st, sk next dc, sk next ch, dc in last dc, turn.
    Rows 13–18: With A, repeat Rows 7–12 (do not change color)—19 (21, 23) V-sts.
    Rows 19–25 (28, 31): With A, repeat Row 2, 7 (10, 13) times (do not change color).
    Shape Armholes
    Row 1: Sk first dc, sl st in each st across to 2nd dc of 2nd V-st, ch 4, dc in same dc, *sk next dc, sk next ch, V-st in next dc; repeat from * across to last 3 V-sts, sk next dc, sk next ch, dc in next dc, turn; leave last 2 V-sts unworked—15 (17, 19) V-sts.
    Row 2: Ch 4, dc in first dc, *sk next dc, sk next ch, V-st in next dc; repeat from * across to last V-st, sk next dc, sk next ch, dc in last dc, turn.
    Row 3 (decrease row): Ch 3, turn, sk first 2 dc, sk next ch (decrease made), V-st in next dc, *sk next dc, sk next ch, V-st in next dc; repeat from * across to last 2 V-sts, dc2tog over 2nd dc of last 2 V-sts (skipping the dc and ch-1 sp between)—13 (15, 17) V-sts.
    Sizes 6 (8-10) Only: Repeat Rows 2 and 3—13 (15) V-sts.
    All Sizes: Repeat Row 2, 1 (1, 2) more times.
    Shape Neck and First Shoulder
    Row 1: Ch 4, dc in first dc, [sk next dc, sk next ch, V-st in next dc] 3 times, sk next dc, sk next ch, dc in next dc, turn; leave remaining sts unworked (for neck and 2nd shoulder)—4 V-sts.
    Row 2 (decrease row): Ch 3, sk first 2 dc, sk next ch, V-st in next dc, *sk next dc, sk next ch, V-st in next dc; repeat from * across to last V-st, sk next dc, sk next ch, dc in last dc, turn—3 V-sts.
    Rows 3–5: Ch 4, dc in first dc, *sk next dc, sk next ch, V-st in next dc; repeat from * across to last V-st. sk next dc, sk next ch, dc in last dc, turn.
    Fasten off.
    Second Shoulder
    With RS facing, sk next 4 (4, 6) unworked V-sts following first shoulder, join A with sl st in 2nd dc of next V-st.
    Row 1: Ch 4, dc in same dc, [sk next dc, sk next ch, V-st in next dc] 3 times, sk next dc, sk next ch, dc in last dc, turn—4 V-sts.
    Row 2 (decrease row): Ch 4, dc in first dc, [sk next dc, sk next ch, V-st in next dc] twice, sk next dc, sk next ch, dc2tog over next dc and turning ch-sp, turn—3 V-sts.
    Rows 3–5: Ch 4, dc in first dc, *sk next dc, sk next ch, V-st in next dc; repeat from * across to last V-st. sk next dc, sk next ch, dc in last dc, turn.
    Fasten off.

    BACK
    Work same as front.

    ASSEMBLY
    With RS together, sew side and shoulder seams.

    RUFFLES
    Hold dress with lower edge at top and RS facing, working across opposite side of foundation chains (around lower edge of dress), join D with sl st in any ch-sp at back.
    Round 1: Ch 1, sc in same ch-sp, ch 3, sl st in top of sc (picot made), *ch 5, sc in next ch-sp, ch 3, picot; repeat from * around; join with ch 2, dc in first sc (joining ch 2 and dc count as ch-sp).
    Rounds 2–5: Ch 1, sc in first ch-sp (formed by join), picot, *ch 5, sc in next ch-sp, ch 3, picot; repeat from * around; join with ch 2, dc in first sc.
    Round 6: Ch 7, sl st in 4th ch from hook (picot made), dc in first ch-sp, [picot, dc in same ch-sp] twice, *dc in next ch-sp, [picot, dc in same ch-sp] 3 times; repeat from * around; join with sl st in base of first picot.
    Fasten off.
    Working in ch-sps of Row 4 (last row of C-colored V-st), join C with sl st in any ch-sp at back. Repeat Rounds 1–6. Fasten off.
    Working in ch-sps of Row 8 (last row of B-colored V-st), join B with sl st in any ch-sp at back. Repeat Rounds 1–6. Fasten off.
    Working in ch-sps of Row 12 (4th row of A-colored V-st), join A with sl st in any ch-sp at back. Repeat Rounds 1–6. Fasten off.

    FINISHING
    Armhole Edging: With RS facing, join A with sc in underarm, work sc evenly spaced around armhole; join with sl st in first sc. Fasten off. Repeat around other armhole.
    Neck Edging: With RS facing, join A with sc in back neck, work sc evenly spaced around neck; join with sl st in first sc. Fasten off.
    Using yarn needle, weave in all ends.


  7. #96
    Nick-name Guest

    Predefinito

    Picot-and-Lace set


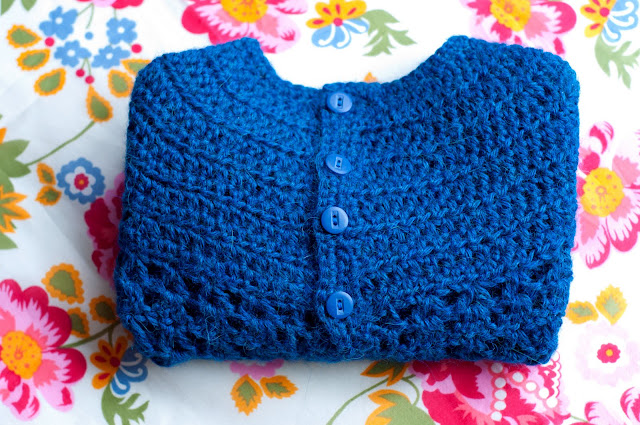
    Aesthetic Nest: Crochet: Blue Picot and Lace Sweater for my Blue-Eyed Girl (Tutorial)


    Materials:
    Sport weight yarn (Jamie by Lionbrand was used in the models shown)
    "J" hook

    Size: 20" chest (3-9 months)

    Gauge(on yoke): 1 inc and 2 hdc= 1"(measured at the base of the stitches)

    *BEG chain does NOT count as first st!

    Ch 32

    Yoke
    1. Sc in second ch from hook and in each ch across. (31 sc). Ch 2, turn
    2. Hdc in first 2 sts, 2hdc in next st (inc made). *hdc in next 2 sts. Inc in next. Rep * across to last st. hdc in last st. Ch 2, turn.
    3. Hdc in next 2 sts. Inc, *hdc in next 3 sts, inc. Rep * across. hdc in last 2 sts. Ch 2, turn.
    4-7. Continue working hdc in each st across with inc in 2nd hdc of inc in row below. Ch 2, turn.

    8. Hdc in 1st 5 sts. Inc. Hdc in next 8 sts. Inc. ch 5 (for armhole). Sk 16 sts, hdc in next st, inc in next. hdc in next 8 sts. *Inc. hdc in next 8 sts. Rep * once more. Inc. Ch 5, sk 16 sts. Hdc in next st. Inc. Hdc in next 8 sts. Inc. Hdc in last 4 sts. Ch 3, turn. Do not fasten off.

    Body: Beg chain counts as a stitch on these rows

    Stitches: V-st[(Dc, ch 1, Dc) in space indicated] Cluster[3dc in same sp]

    9. Dc in 1st st. Sk 2 sts. *V-st in next, sk 2 sts. Rep * across to last 2 sts. Dc in last st. Ch 3, turn
    10.Dc in 1st st. Cluster in each ch1-sp of v-sts. Dc in beg st. Ch 3 turn

    Rep 9 & 10 for body pattern to a total of 16 rows from beginning. Do not fasten off.

    Edging
    Stitches: Picot[ch 3, sl st into last st made]

    Sl st up front in ends of rows, adding 3 evenly spaced button holes (ch 1 or ch 2 instead of sts) between rows 1-8. Sc around neck, adding picots if desired(for lacier look). Sc down other front. Sc across bottom placing picots every 3rd st. Fasten off.

    Sleeves
    Attatch yarn to underarm. Place between 20-23 sts around. Join. Ch 2, without turning, countinue to work rnds of hdc until legnth of sleeve is desired.(about 10 rows).

    11. Hdc-dec in every 3rd st.
    12. Sl st around looselyy, placing a picot every 3 sts. Fasten off.

    Rep for other sleeve


    TUTORIAL PASSO A PASSO

    (size 6-12 months)

    **This pattern takes the free pattern designed by Abigail Goss of Crotiques and upsizes it with some revisions to fit a baby 6-12 months**

    MATERIALS:

    • 4 skeins KnitPicks Andean Treasure in Sapphire Heather (or another Sport weight yarn)

    • Size J hook

    • 4 ½” buttons

    • Tapestry needle for weaving in ends

    ABBREVIATIONS:

    • Ch: Chain

    • Sc: Single Crochet

    • Hdc: Half Double Crochet

    • Dc: Double Crochet

    • Dsc: Decrease Single Crochet

    • Sl st: Slip stitch

    SPECIAL STITCHES:

    • V-stitch: dc-ch1-dc in same stitch

    • Cluster stitch: 3 dc in same stitch

    • Picot: sc-ch3-sl st in same stitch


    (To picot: sc, chain 3...)


    (...and slip stitch in the same space)

    YOKE:


    Chain 43. Turn.

    Round 1: Single crochet (sc) in second chain (ch) from hook and in each ch across. (42 sc). Ch 2, turn.

    Round 2: Half double crochet (hdc) in first 2 sc, 2hdc in next sc (increase made). *Hdc in next 3 sc. 2 hdc in next sc.** Repeat from * to ** until last sc. Ch 2, turn. (52 hdc)

    Round 3: Hdc in each hdc across. Ch 2, turn. (52 hdc)

    Round 4: Hdc in next 3 hdc, 2hdc in next hdc. *Hdc in next 4 hdc, 2hdc in next hdc.** Repeat from * to ** utnil last sc. Ch 2, turn. (62 hdc)

    Round 5: Hdc in each hdc across. Ch 2, turn. (62 hdc)

    Round 6: HDC in next 4 hdc, 2hdc in next hdc. *Hdc in next 5 hdc, 2 hdc in next hdc.** .** Repeat from * to ** until last sc. Ch 2, turn. (72 hdc)

    Round 7: Hdc in each hdc across. Ch 2, turn. (72 hdc)

    Round 8: HDC in next 5 hdc, 2hdc in next hdc. *Hdc in next 6 hdc, 2 hdc in next hdc.** .** Repeat from * to ** until last sc. Ch 2, turn. (82 hdc)

    Round 9: Hdc in each hdc across. Ch 2, turn. (82 hdc)

    Round 10: HDC in next 6 hdc, 2hdc in next hdc. *Hdc in next 7 hdc, 2 hdc in next hdc.** .** Repeat from * to ** until last sc. Ch 2, turn. (92 hdc)

    Round 11: Hdc in each hdc across. Ch 2, turn. (92 hdc)

    Round 12: Hdc in next 7 hdc, 2hdc in next hdc. *Hdc in next 8 hdc, 2 hdc in next hdc.** .** Repeat from * to ** t last sc. Ch 2, turn. (102 hdc)


    BODY (forming armholes): note that the beginning chain counts as the first stitch on these rows

    Round 13: Hdc in first 7 hdc, 2 hdc in next hdc, hdc in next 7 hdc. Chain 7. Skip next 19 hdc, Hdc in next 10 hdc, 2 hdc in next hdc, hdc in next 10 hdc, 2 hdc in next hdc, hdc in next 10 hdc. Chain 7. Skip next 19 hdc. Hdc in next 7 hdc, 2 hdc in next hdc, Hdc in next 8 hdc. Turn.


    Round 14 (v-stitch round): Chain 3. Dc in next hdc, *sk next 2 hdc, v stitch in next hdc** repeat from * to ** 3 more times. Skip the next hdc, v-stitch in 1st chain stitch of right armhole, sk 2 ch, v-stitch in next ch, sk 2 ch, v-stitch in next ch, *sk next 2 hdc, v-stitch in next hdc**. Repeat from * to ** 9 more times. Sk next 3 hdc, v-stitch in 1st chain stitch of left armhole, sk 2 ch, v-stitch in next ch, sk 2 ch, v-stitch in next ch, *sk next 2 hdc, v-stitch in next hdc**. Repeat from * to ** 3 more times. Skip next 2 hdc and dc in next 2 hdc.

    Round 15 (cluster round): Chain 3. Dc in next dc, *cluster in ch-1 space of the next v-stitch**. Repeat from * to ** around. Dc in the last two dc.

    Repeat v-stitch (v-stitch in the middle dc of each cluster stitch) and cluster (cluster stitch in the ch-1 space of each v-stitch) rounds five more times for a total of twelve lace rows. Do not fasten off.


    EDGING:

    Ch 1 and sc up left front working in ends of rounds. Ch 1 and turn. Sc in each sc down left front, making 4 button holes spaced evenly down the yoke (the hdc stitches). (To make buttonholes: from the top, sc 2, ch 2 and sk the next 2 sc. I then worked 5 sc to the next buttonhole and so on.) Ch 1 and turn. Sc in each sc and chain stitch up the front of the left front. Do not turn. Ch 1 and sc in each stitch along the neck. Ch 1 and sc down the right front working in the ends of the rounds. Ch 1 and turn, sc in each sc up the right front. Ch 1 and turn, sc in each sc down the right front. Ch 1 and work picot edging along the bottom as follows: *sc 3, picot** repeat from * to ** around finishing with sc in the last 3 stitches.

    Fasten off.
    SLEEVES: 16 rows… 30 stitches to 18 stitches

    Attach yarn to underarm. Work 30 hdc around and join with a sl st. Do not turn, but instead continue to work in the round. Ch 2, work 1 hdc in the same stitch and then 1 hdc in each hdc around. Work a total of 4 rows from the join and work a decrease by skipping the first hdc (the one in the same space as the chain) (29 hdc). Work 12 more rows decreasing 1 hdc at the beginning of each round for a total of 16 rows and and final round of 18 hdc. Fasten off.

    Repeat for second sleeve.
    Weave in ends.

    Sew on 4 buttons on the right edging opposite the buttonholes.


  8. #97
    Nick-name Guest

    Predefinito

    NEW Crocheted Baby Hoodie Pattern from Bernat! » Wee Baby Stuff | Get ready for baby. « Keywords: crochet, hoodie, baby, sweater


    Bernat: Pattern Detail - Baby Coordinates - Crochet Hoodie Jacket
    SIZES
    6 (12-18) mos.
    To fit chest measurement: 17 (18-19) ins 43 (45.5-48) cm].
    Finished chest: 19 (20-23) ins [48 (51-58.5) cm].

    MATERIALS
    Bernat® Baby Coordinates (160 g / 5.6 oz)
    MC: 1 (1-1) ball of #09317 (Lovely Lilac)
    A: 1 (1-1) ball of #01000 (White)

    Size 4 mm (U.S. G or 6) crochet hook or size needed to obtain gauge. 5 buttons.

    GAUGE
    15 hdc and 10 rows = 4 ins [10 cm].

    ABBREVIATIONS
    Bernat® Glossary

    INSTRUCTIONS
    The instructions are written for smallest size. If changes are necessary for larger sizes the instructions will be written thus ( ).
    Notes: • Garment is worked in one piece.
    • Ch 2 for turning ch does not count as hdc.
    Beg at Back, with MC ch 38 (40-45).
    1st row: (RS). 1 hdc in 3rd ch from hook. 1 hdc in each ch across. Turn. 36 (38-43) hdc.
    2nd row: Ch 2. 1 hdc in each hdc to end of row. Turn.
    Rep last row until work from beg measures 6½ (7-8) ins [16.5 (18-20.5) cm] ending with a WS row.

    Shape sleeves: Next 2 rows: Ch 13 (15-17). 1 hdc in 3rd ch from hook. 1 hdc in next 10 (12-14) ch. 1 hdc in each hdc of row. Turn. 58 (64-73) hdc at end of 2nd row.
    Work 12 (12-14) rows even.

    Shape neck and divide fronts: Next row: (RS). Ch 2. 1 hdc in next 20 (23-27) hdc. Turn. Leave rem sts unworked.
    Next row: Ch 11 (11-12). 1 hdc in 3rd ch from hook. 1 hdc in next 8 (8-9) ch. 1 hdc in each hdc to end of row. Turn. 29 (32-37) hdc.
    Work 11 (11-13) rows even on these 29 (32-37) hdc for right front.
    Next row: (WS). Ch 2. 1 hdc in next 18 (19-22) hdc. Place a marker on last st. Turn. Leave rem sts unworked. Cont even on last 18 (19-22) hdc until work from marker measures 6½ (7-8) ins [16.5 (18-20.5) cm], ending with a WS row. Fasten off.
    With RS facing, miss 18 (18-19) hdc at center back. Join MC with sl st to next hdc. Ch 11 (11-12). 1 hdc in 3rd ch from hook. 1 hdc in next 8 (8-9) ch. 1 hdc in same sp as first sl st. 1 hdc in each hdc to end of row. 29 (32-37) hdc. Turn. Work to correspond to right front, reversing all shapings.

    FINISHING
    Sew side and sleeve seams.
    Hood: 1st row: (RS). Join MC with sl st at corner of right front neck edge. Ch 1. Work 38 (38-40) sc evenly across neck edge. Turn.
    2nd row: Ch 2. *1 hdc in each of next 2 sc. 2 hdc in next sc. Rep from * to last 2 (2-4) sts. 1 hdc in each of last 2 (2-4) sts. 50 (50-52) hdc.
    3rd row: Ch 2. 1 hdc in each st across. Turn. Rep last row until hood measures 7½ (8-8½) ins [19 (20.5-21.5) cm].
    Fasten off. Sew top hood seam.

    Outer edging: 1st rnd: (RS). Join A with sl st at lower edge of right side seam. Ch 1. Work sc evenly around outer edge of Jacket (including hood), working 3 sc in each corner. Join with sl st to first sc.
    2nd rnd: Ch 1. 1 sc in first sc. Ch 3. *Miss next 2 sc. 1 sc in next sc. Ch 3. Rep from * around to last 2 sc. Miss last 2 sc. Join with sl st to first sc. Fasten off.
    Sew on buttons evenly spaced using loops worked in final rnd of edging as button loops.
    Sleeve edging: 1st rnd: (RS). Join A with sl st at sleeve seam and work sc evenly around sleeve edge. Join with sl st to first sc.
    2nd rnd: Ch 1. Working from left to right instead of right to left as usual, work 1 reverse sc in each sc around. Join with sl st to first sc. Fasten off.

  9. #98
    Nick-name Guest

    Predefinito

    Allegato 199713Allegato 199714Allegato 199715Allegato 199716

    Dietro richiesta di terry and Mary, ho inserito gli schemi grafici della paginona centrale della rivista Uncinetto tuniso bimbi, relativi al vestitino del post n. 47
    Ultima modifica di AnnaEmme; 30-07-2011 alle 18:26

  10. I seguenti 2 utenti ringraziano Nick-name per questa discussione:

    AnnaEmme (23-07-2011), TERRY-AND-MARY (23-07-2011)

  11. #99
    Nick-name Guest

    Predefinito

    http://needleworkersroom.blogspot.com/2008_07_01_archive.html sito di Cozy Sue
    http://www.ravelry.com/patterns/libr...n-baby-sweater qui potete scaricare l'originale in inglese


    Sue's Hexagon Baby Sweater di Cozy Sue
    traduzione di B.Ajroldi-G.Lorenzini

    uncinetto 3,5 - 3,75 - 4
    filato merino dk o sport Dk

    mb = maglia bassa
    ma = maglia alta
    cat = catenella
    mma = mezza maglia alta
    Tglia 3-6mesi
    Montare 6 catenelle , e unirle con un punto bassissimo per formare un
    cerchio.

    Corpo del golfino
    giro 1 = 3 cat (CHE SOSTITUISCONO UNA MAGLIA ALTA ALL'INIZIO DI OGNI GIRO) ,
    1 maglia alta nel cerchio, * 2 cat, 2 m a nel cerchio,* rip da * a * 4
    volte, 1 cat, 1 m m a all'inizio delle 3 cat di inizio giro ( 6 serie di 2
    maglie alte)

    giro2 = 3 ca, 1 m a nello stesso punto, * lavorare 1 m a in ogni m a, 2 m a,
    2 cat, 2 m a i ogni spazio* rip da * a * per 4 volte, m a in ogni m a, 2 m a
    in ogni spazio, 1 cat, m m a all'inizio delle 3 cat di inizio giro.

    giro 3-12 = ripetere giro 2
    Al termine di questa sequenza fissare il filo e tagliare.
    Fare un secondo esagono nello stesso modo lasciando il filo lungo alla fine
    per le cuciture.

    Cucire i due esagoni insieme lungo un lato, e poi piegare .
    La cucitura sarà il nuovo centro del maglione. La parte superiore delle
    maniche sarà aperta , fare riferimento alle immagini inserite.
    Cucire la parte superiore delle maniche fino a circa la metà del davanti.

    Manica-polsini
    Lavorare a mb due giri in questo modo:
    g1 = 5 mb, saltare 1 maglia di base, 5 mb, saltare 1 m di base, continuare in questo modo fino alla fine dei punti.
    Lavorare 1 giro a mb.
    Lavorare la seconda manica nello stesso identico modo.


    Bordi
    g 1 = Alla base del collo, nella prima m di base lavorare 1 mb, 5 cat, 1 mb (asola 1), lavorare 10 mb, nella maglia successiva di nuovo 1 mb-5cat-1mb (asola 2), ripetere questa sequenza fino ad avere realizzato 4 asole.
    Proseguire a mb , avendo cura di lavorare 3 mb, nella maglia d'angolo della fine del dav e del bordo del collo.
    g2 = lavorare a mb, nell'archetto di 5 cat lavorare 4 mb.
    Alla fine di questo giro, voltare il lavoro e lavorare un ulteriore giro sui punti del colletto.
    Tagliare il filo e chiudere.

    Cucire i bottoni in corrispondenza delle asole


    .
    Ultima modifica di Nick-name; 05-08-2011 alle 19:56 Motivo: correz ort

  12. I seguenti 6 utenti ringraziano Nick-name per questa discussione:

    anna lela (08-08-2011), AnnaEmme (03-08-2011), bluenady (04-08-2011), katia71 (10-05-2012), pippiele (23-12-2011), roshann (04-08-2011)

  13. #100
    Nick-name Guest

    Predefinito


    5mm hook
    worsted weight yarn (I used Caron Simply Soft Brites, Rose Violet; less than 1 skein)
    7/8″/22mm button
    stitch markers
    yarn needle
    Gauge: 14 DC; 8 rows = 4″
    Corner= 3DC in one st
    Picot= Ch 4, slst in bottom chain
    Chain 48
    1) DC in second chain from hook & next 5 sts. Dc 3x in next st, PM in middle st. Dc in next 9 sts. Dc 3x in next st, PM in middle st. Dc in next 12 sts. Dc 3x in next st, PM in middle st. Dc in next 9 sts. Dc 3x in next st, PM in middle st. Dc in last 6 sts. Ch 2, turn.
    2 – 6) DC in each DC before first marker. Corner in marked st; move marker up. Dc in each Dc between markers, cornering & moving markers as before. Dc in last sts. Ch 2, turn.
    7) DC to first marker. Remove first & second markers; Dc through both sts. DC to next marker. Remove it & last marker, DC through these sts. DC to end. Join with slst to first st in row.
    FROM HERE ON OUT, YOU WILL WORK IN ROUNDS. NO MORE TURNING.
    8 ) Ch 2. *Dc in one st, Dc twice in following st* around. Join with slst.
    9 – 25) Ch 2. Dc in each st. Join with slst.
    Edging: Picot in first st. Slst in next 3 sts; Picot in 3rd st. Continue in this fashion around to beginning. Join & finish off.
    SLEEVES:

    1) Join to free st in armhole. Ch 2. DC in each st around. Join with slst.
    2 – 4) Ch 2. DC in each st around. Join with slst. Finish off at the end of round 4.
    Weave in all loose ends.
    Sew button at the neckline. To button the dress, just slip the button between two sts on the other side of the neckline.

Pagina 10 di 20 PrimaPrima ... 89101112 ... UltimaUltima

Discussioni Simili

  1. Moda bimbi dai 4 anni in poi...
    Di miriam p nel forum Schemi tematici Uncinetto
    Risposte: 40
    Ultimo Messaggio: 22-09-2019, 10:04
  2. i "Bimbi farfalla" e "coccinella" di Natalia
    Di Natalia nel forum Dalle Maghette ai Ricami
    Risposte: 48
    Ultimo Messaggio: 18-04-2014, 17:59
  3. Risposte: 6
    Ultimo Messaggio: 10-05-2012, 17:31
  4. Benvenute alle nuove moderatrici di "Moda Taglio e Cucito"!!
    Di Account non Attivo nel forum Moda Taglio e Cucito
    Risposte: 13
    Ultimo Messaggio: 09-11-2011, 20:15
  5. Risposte: 8
    Ultimo Messaggio: 27-03-2011, 22:27

Chi Ha Letto Questa Discussione: 4

Segnalibri

Segnalibri

Permessi di Scrittura

  • Tu non puoi inviare nuove discussioni
  • Tu non puoi inviare risposte
  • Tu non puoi inviare allegati
  • Tu non puoi modificare i tuoi messaggi
  •