Pagina 2 di 4 PrimaPrima 1234 UltimaUltima
Risultati da 11 a 20 di 39

Discussione: NATALE A MAGLIA-foto-schemi-punti-decorazioni

  1. #11
    L'avatar di Lo Staff
    Lo Staff è offline Moderatrice
    Data Registrazione
    11-12-2011
    Messaggi
    17,463
    Grazie
    0
    Ringraziato 14,979 volte in 6,543 Discussioni

    Predefinito Natale a maglia -modelli-foto-schemi-punti-decorazioni

    NATALE A MAGLIA-foto-schemi-punti-decorazioni-set-xmas-jpghttp://www.p2designs.com/pdfs/HatTreeElfSox.pdf spiegazione scaricabile qui, taglie da prematuro a bebè


    NATALE A MAGLIA-foto-schemi-punti-decorazioni-hollydayshat-jpg


    http://www.p2designs.com/pdfs/hollydayshat.pdf cappello
    http://www.p2designs.com/pdfs/hollydayssox.pdf scarpine


    NATALE A MAGLIA-foto-schemi-punti-decorazioni-set-snow-jpg


    http://www.p2designs.com/pdfs/SnowHatSox.pdf
    Ultima modifica di Nick-name; 20-09-2011 alle 16:38 Motivo: corretto inserimento

  2. #12
    L'avatar di Lo Staff
    Lo Staff è offline Moderatrice
    Data Registrazione
    11-12-2011
    Messaggi
    17,463
    Grazie
    0
    Ringraziato 14,979 volte in 6,543 Discussioni

    Predefinito

    Maggie's Rags Free Knitting Patterns - Christmas Wreath Ornament


    NATALE A MAGLIA-foto-schemi-punti-decorazioni-wreath-jpg
    Materials - Small amounts of red, green and white worsted weight yarn.

    Needles - A pair of size #7 US (4.5 mm) double pointed needles.
    Make three 8" long pieces of I-cord, one in each color, leaving at least a 6" tail of yarn hanging from both ends of I-cord.
    To make I-cord:
    Cast on 3 sts.
    Knit across.
    Without turning, slide the stitches to the other end of the needle, put the needle in your other hand, pull the yarn firmly across the back. You are ready to knit the next row.
    Continue knitting, sliding, and pulling the yarn across the back until I-cord is desired length.
    Braid the three strands of I-cord, then tie into a circle using the loose ends of yarn. Knot firmly, then tie into a bow. Trim ends of yarn.
    Add a hook or loop for hanging. Makes a wreath about 3" in diameter.

  3. #13
    L'avatar di Lo Staff
    Lo Staff è offline Moderatrice
    Data Registrazione
    11-12-2011
    Messaggi
    17,463
    Grazie
    0
    Ringraziato 14,979 volte in 6,543 Discussioni

    Predefinito

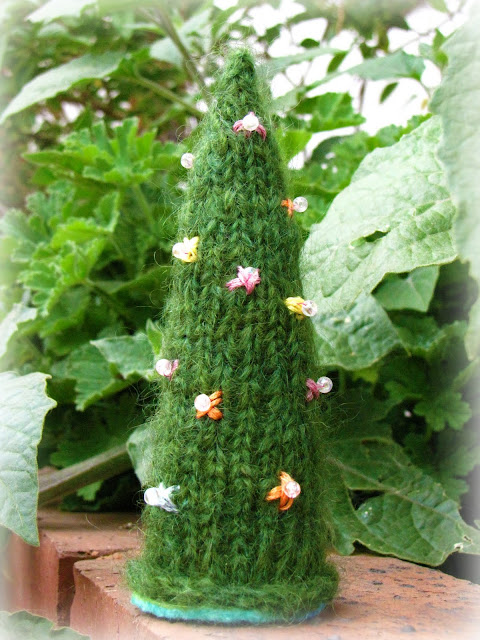
    Natural Suburbia: Christmas Tree Knitting Pattern Tutorial


    Materials:


    Green Mohair Yarn, double knitting (DK) weight.

    Size 4mm circular needles for knitting in the round with the Magic Loop Technique or 4 double pointed needles to knit in the round.

    Fleece for stuffing.

    Embroidery thread

    Beads

    Felt

    Scissors

    Wool needle for sewing up your tree and embroidery needle for sewing.


    Pattern:


    Cast on 25 stitches and join for knitting in the round.

    Knit 5 rows

    (Knit 5 stitches, knit 2 together) across the round, knit 4 stitches on the end (22 stitches)

    Knit 9 rows

    (Knit 5 stitches, knit 2 together) across the round, knit 1 stitch on the end (19 stitches)

    Knit 9 rows

    (Knit 5 stitches, knit 2 stitches together) across the round. (17 stitches)

    Knit 7 rows

    (Knit 3 stitches, knit 2 stitches together) across the round, knit 3 on end. (15 stitches)

    Knit 3 rows.

    Knit 2 stitches together at the beginning and end of the remaining rounds until you have one stitch left.

    Bind off.


    Finishing off:


    Sew up your tree on the wrong side leaving the base open.

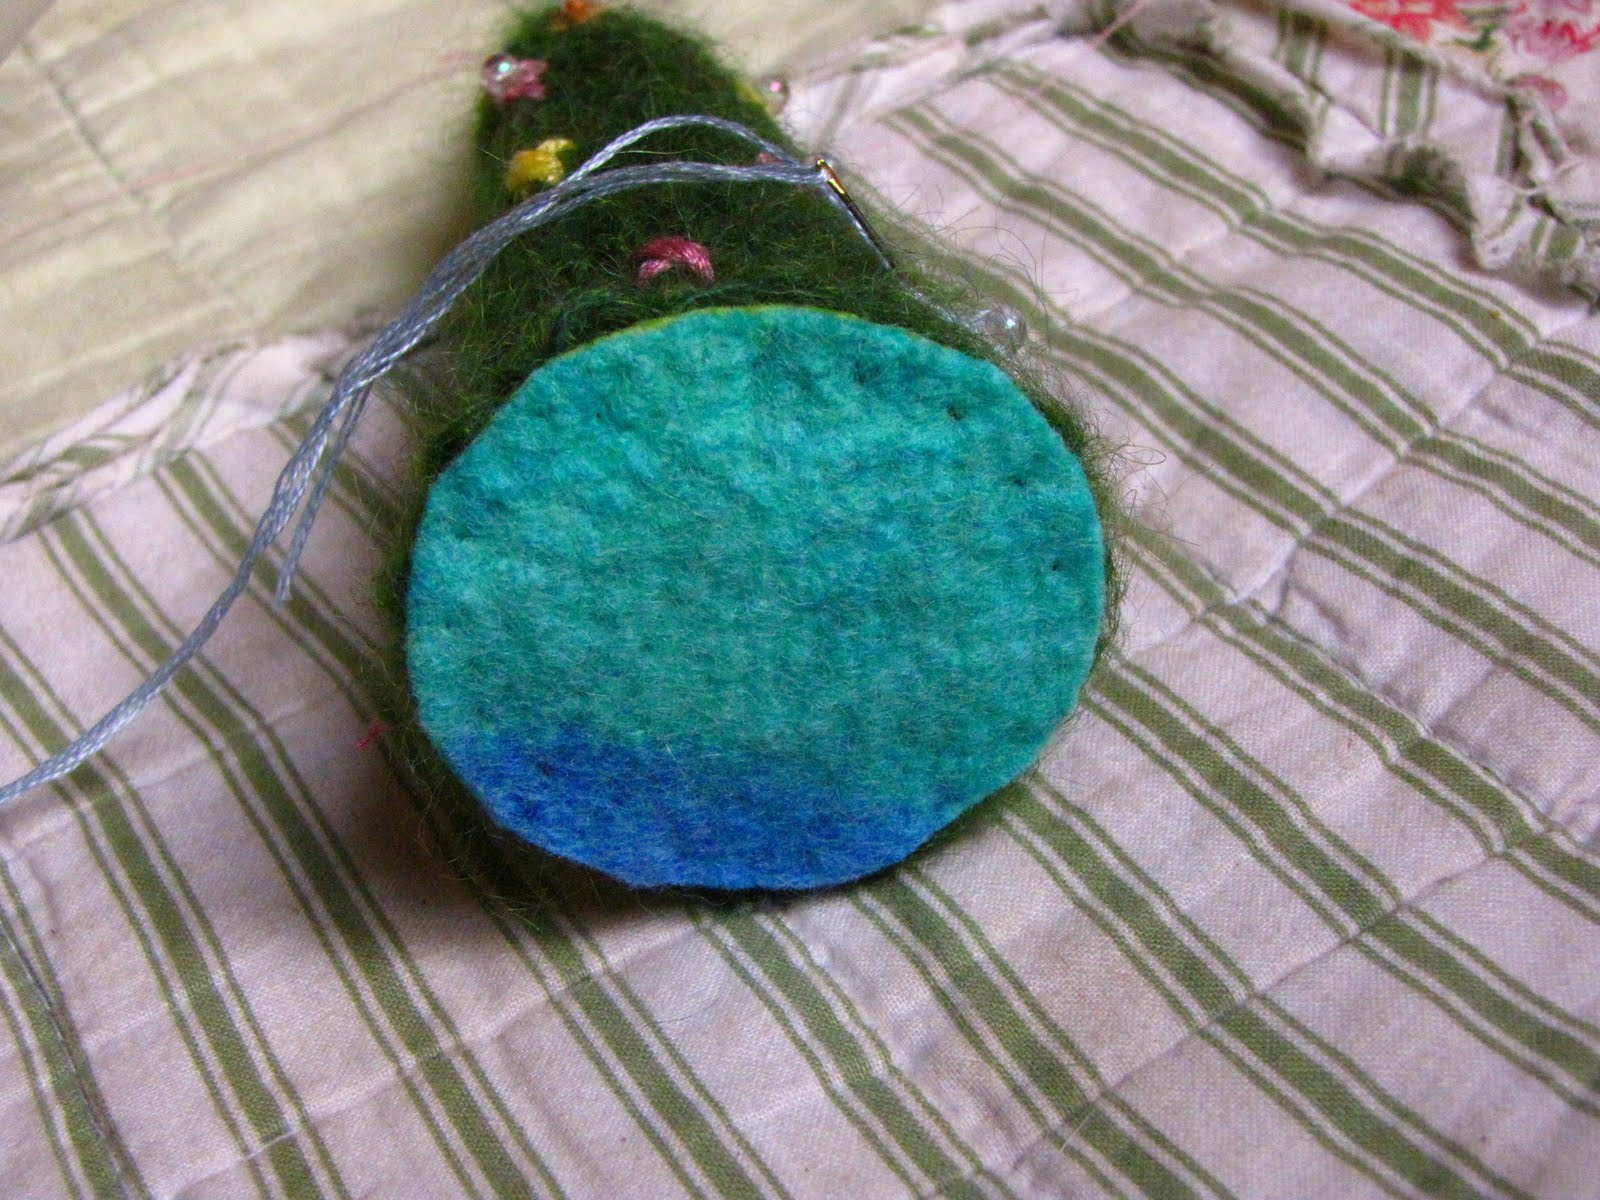
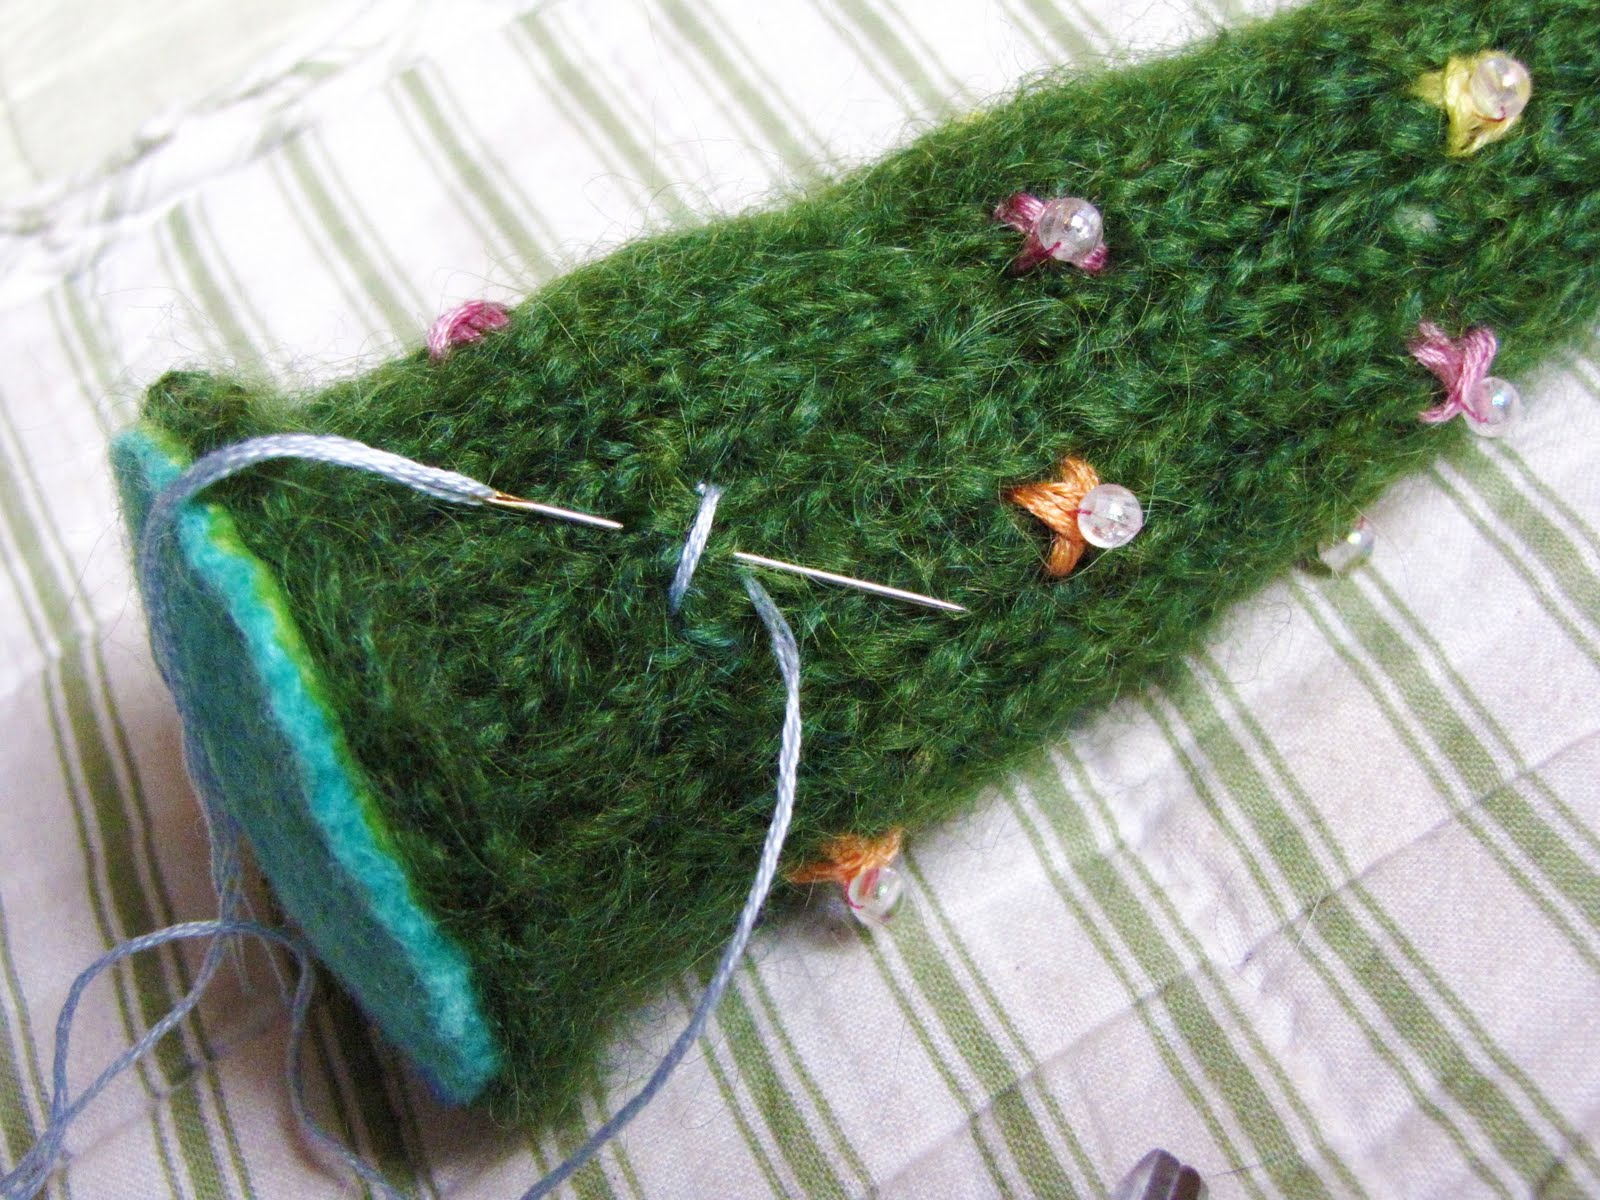
    Fill your tree with fleece and when it is nice and firm, sew on your felt base.


  4. #14
    L'avatar di Lo Staff
    Lo Staff è offline Moderatrice
    Data Registrazione
    11-12-2011
    Messaggi
    17,463
    Grazie
    0
    Ringraziato 14,979 volte in 6,543 Discussioni

    Predefinito


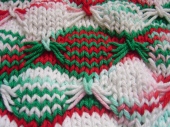
    Knitting Bee – Free knitting tutorials – Free knitting patterns

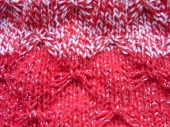
    Christmas Cloth Pattern | Ribbed For Your Pleasure

    Materials:
    Any worsted weight 100% cotton yarn
    Size US 6 or 7 needles
    tapestry needle
    Directions:
    Cast on 45 stitches or # of stitches divisible by 10+7, with 8 additional stitches for the border. Ex. This cloth is 37 stitches for the pattern plus 8 border stitches = 45.
    Knit 4 rows.
    Row 1: K10, *yarn forward, sl 5 purlwise, yarn back, K5, repeat from * to last five stitches, K5
    Row2: K4, P37, K4
    Repeat Rows 1 and 2 three more times.
    Row 9: K12, *insert right hand needle under the four long slip stitches, wrap yarn around the needle and draw through a stitch, then keeping that stitch on the right hand needle K the next stitch on the left hand needle. Pass the wrap around stitch over the K1 (make butterfly), K9, repeat from * one more time, make butterfly, K12
    Row 10: K4, P37, K4
    Row 11: *K5, yarn forward, sl 5 purlwise, yarn back, repeat from * to last five stitches, K5
    Row 12: K4, P37, K4
    Repeat Rows 11 and 12 three more times.
    Row 19: K7, make butterfly, *K9, make butterfly, repeat from * to last 7 stitches, K7
    Row 20: K4, P37, K4
    Repeat these 20 rows two more times.
    Knit 4 or 5 Rows.
    Bind Off.
    Weave in Ends.

  5. #15
    L'avatar di Lo Staff
    Lo Staff è offline Moderatrice
    Data Registrazione
    11-12-2011
    Messaggi
    17,463
    Grazie
    0
    Ringraziato 14,979 volte in 6,543 Discussioni

    Predefinito

    Allegato 218969
    http://www.pourfemme.it/articolo/dec...fai-da-te/787/


    L'articolo seguente è tratto dal sito<. http://www.pourfemme.it/articolo/dec...fai-da-te/787/


    In questo caso pon pon, piccoli pennacchi, fiocchi di neve e stelle in lana sostituiscono i classici addobbi per creare una straodinaria combinazione di colori. Una decorazione di questo tipo si può realizzare anche con l’aiuto dei bambini ed è assolutamente poco costosa.
    I pon pon si possono realizzare manualmente se si ha un po’ di dimestichezza con i lavori a maglia, oppure si possono acquistare già fatti nelle mercerie a pochissimo prezzo. Le altre decorazioni sono invece realizzabili molto facilmente, come ad esempio i fiocchi di neve e le stelle, utilizzando un filo metallico come scheletro di supporto e attorcigliandoci intorno il filo di lana del colore scelto, fino a coprirlo completamente. Oppure, si può disegnare il profilo della forma desiderata su un pezzo di carta velina, (in foto) posizionarci sopra il filo di lana e bagnare di colla. Una volta asciugato, il filo prenderà la forma che gli avete dato.
    Per i pennacchi, basta ripiegare un filo intorno ad un pezzo di cartoncino, tagliarli e legare il tutto in prossimità della piegatura con un altro filo ( come vi mostriamo in foto) per realizzare dei piccoli ganci per poterli appendere all’albero.
    Per ottenere la stella puntale, posta sulla sommità dell’albero, occorre legare al centro, come a formare un asterisco, tre bastoncelli della stessa misura. Una volta fissati si può passare a rivestire il tutto con la lana avvolgendo i fili colorati più volte intorno alla struttura. Le estremità si ottengono invece avvolgendo i fili intorno a un dito, sfilandoli, legandoli con un altro filo nel centro, tagliuzzando i fili nelle due estremità e sistemandoli per bene come a formare un pon pon. A questo punto si possono incollare alle punte delle stecche della stella. Per la ghirlanda il procedimento è facilissimo, basta prendere tre o quattro fili di colore diverso e legarli di tanto in tanto tra di loro lungo tutta la lunghezza.

    Per completare il lavoro, usate come portavaso un cesto in corda, magari proprio di quelli usati per conservare la lana, per restare perfettamente in tema con lo stile della decorazione.
    Ultima modifica di mammagiulietta; 09-07-2012 alle 22:23 Motivo: aggiunta foto precedentemente tolta dall'utente

  6. #16
    L'avatar di Lo Staff
    Lo Staff è offline Moderatrice
    Data Registrazione
    11-12-2011
    Messaggi
    17,463
    Grazie
    0
    Ringraziato 14,979 volte in 6,543 Discussioni

    Predefinito

    dal sito pourfemme.com

    La borsetta di Natale


    Occorrente:
    400 gr di lana rossa, arancio o colore a scelta, ferri n 10, ferro ausiliario, ago da lana

    Esecuzione: maglia rasata diritta, maglia rasata rovescia, maglia legaccio, punto dama (si lavora su un numero di maglie multiplo di 4)

    La borsa si compone di due parti uguali. Per la parte anteriore, con il filato usato a 4 fili avviate 26 m e lav 2 m a m ras. dir., 2 m. a m. ras. rov., 18 m. a punto paniere, 2 m. a m. ras. rov. 2 m. a m. ras. dir. Ai lati aumentate 1 m. ogni 2 ferri per 8 volte e lavorate queste nuove m. a punto dama. A cm 22, nel ferro successivo, lavorate 1 ferro a rov. sul dir. del lavoro quindi intrecciate le maglie sul rov. Per la parte posteriore procedete come per la parte anteriore fino a cm 22 di altezza. Poi nel ferro successivo lav. le prime 10 m. a rov. le 22 m. seguenti nel punto in cui si pres. e le ultime 10 m. a rov. Nel ferro di ritorno intrecciate le prime e le ultime 10 maglie. Per realizzare la parte della borsa che la chiude dim. ai lati all'interno delle prime e ultime 2 m. 2 m. ogni 2 ferri per 3 volte. A cm 16,5 intrecciate le maglie rimaste. Rifinite cucendo i lati della borsa, create la tracolla con 6 fili di filato, preparando un cordone di 60 cm. Cucite ciascuna tracolla sul margine superiore della borsa, a 1 cm dalla rispettiva cucitura laterale.

  7. #17
    L'avatar di Lo Staff
    Lo Staff è offline Moderatrice
    Data Registrazione
    11-12-2011
    Messaggi
    17,463
    Grazie
    0
    Ringraziato 14,979 volte in 6,543 Discussioni

    Predefinito

    Alberello di Natale

    Occorrente:
    20 gr di filato di lana verde, pochi grammi di filato rosso e giallo scuro, una gugliata di filato di lana bianca di grosso spessore, ferri n 31/2, ago da lana

    Esecuzione: maglia rasata diritta. Ricamo a punto nodini. Per la parte posteriore, con il filato verde, avviate 23 maglie e lavoratele a maglia rasata diritta seguendo lo schema per le diminuzioni e gli aumenti. Al termine dello schema intrecciate le maglie rimaste. Eseguite la parte anteriore allo stesso modo, poi ricamatela col rosso distribuendo alcuni punti nodini a piacere o con delle perline. Cucite i margini laterali, inserite l'imbottitura e quindi cucite il fondo. Decorate con alcuni fiocchetti color giallo scuro. Cucite la gugliata in lana bianca lungo il margine inferiore.


    da tempo libero pour femme
    Ultima modifica di Nick-name; 20-09-2011 alle 17:14 Motivo: firma

  8. #18
    L'avatar di Lo Staff
    Lo Staff è offline Moderatrice
    Data Registrazione
    11-12-2011
    Messaggi
    17,463
    Grazie
    0
    Ringraziato 14,979 volte in 6,543 Discussioni

    Predefinito


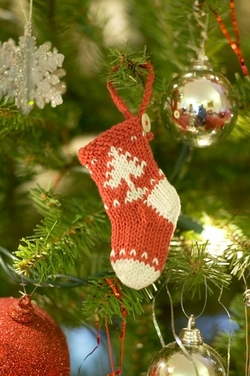
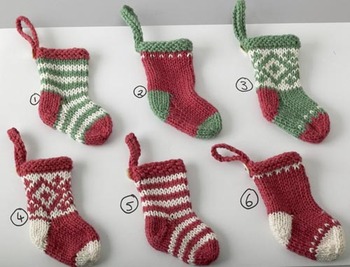
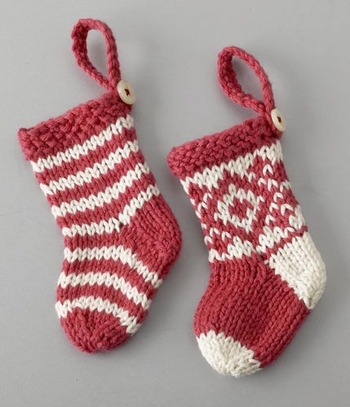
    Free knitting patterns: knitted mini christmas stockings

    Materials:
    oddments of yarn. I prefer to knit these on 2.75 mm needles with pure cotton 4ply but the pattern will knit up with whatever you prefer. Note, obviously the larger the needle size and thicker the yarn, the larger the finished stocking. Before you start, decide which colour you are going to knit the heel in and cut a length at least 110cm (44”) keep to one side for second heel shaping*.
    PATTERN:
    Cast on 25 sts, **(27 if knitting a fairisle design)
    rows 1 - 3: knit
    row 4: (right side) begin pattern from charts below (if required)
    work a total of 14 rows of pattern ending with a wrong side row.
    **if working in fairisle design: on last wrong side row of pattern chart decrease 1 stitch at either end to give 25 stitches
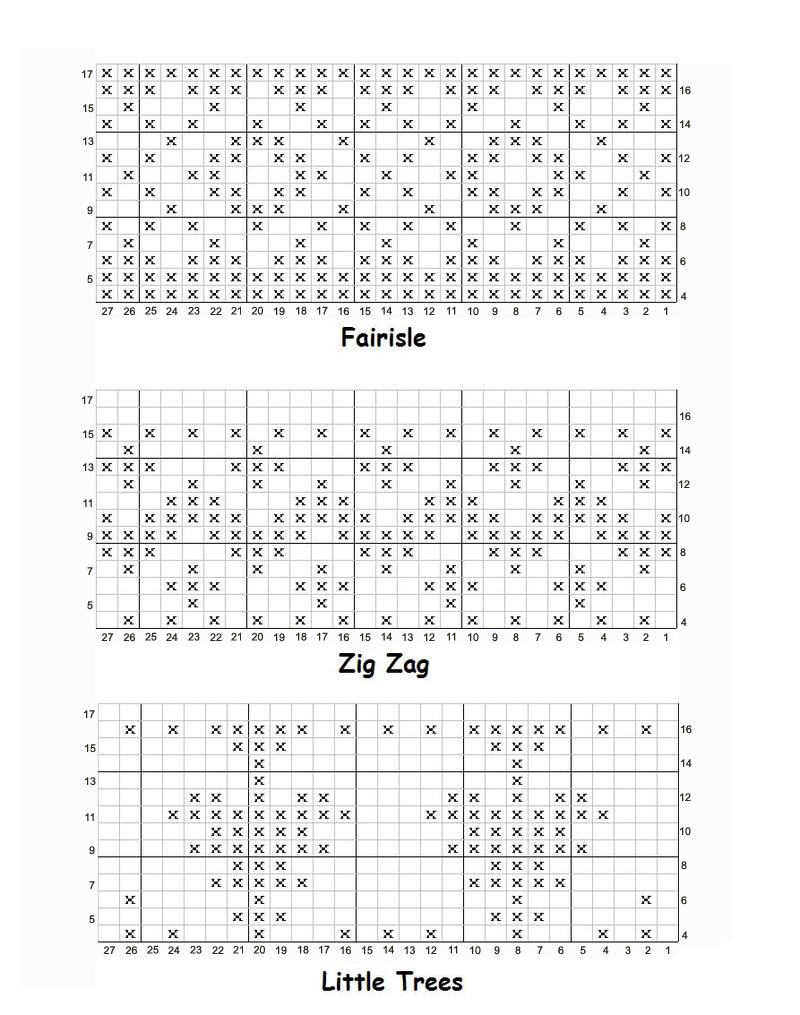


    Start at the bottom of the chart for the pattern charts
    Heel shaping:
    I like to use different coloured yarn to accentuate heel. The heel is worked in 2 halves.
    row 18: with right side facing, k7 and turn leaving remaining stitches on needle
    row 19: slip 1, p6
    repeat these 2 rows 3 more times until 8 rows of heel have been worked
    row 26: k3, k2tog through the back, k1, turn leaving 1 remaining stich of heel on needle (see photo step 1)

    row 27: slip 1, p4
    row 28: k2, k2tog through the back, turn leaving remaining 2 stiches on needle
    row 29: slip 1, p2
    row 30: k2, k2tog through the back, k1, turn
    row 31: slip 1, p3
    leaving these 4 stitches on needle with the main part of the stocking, slide all the work along needle, turn with wrong side facing and resume working the other side of the heel (see photo step 2).

    reverse row 18: with wrong side facing and using 110cm length of yarn cut earlier*, p7 and turn leaving remaining stitches on needle
    reverse row 19: slip 1, k6
    repeat these 2 rows 3 more times until 8 rows of heel have been worked
    reverse row 26: p3, p2tog, p1, turn leaving 1 remaining stich of heel on needle
    reverse row 27: slip 1, k4
    reverse row 28: p2, p2tog, turn leaving remaining 2 stiches on needle
    reverse row 29: slip 1, k2
    reverse row 30: p2, p2tog, p1, turn
    reverse row 31: slip 1, k3
    row 32: with right side facing rejoin main colour and begin knitting across first 4 stitches of heel shaping, pick up 5 stitches from inside edge of heel (see photo step 3), knit 11 stitches across main part of stocking, pick up 5 stitches from inside edge of 2nd heel half and knit final 4 stitches (29 stitches on needle) (see photo step 4)

    row 33: purl
    row 34: K8, k2tog, k9, k2tog through the back, k8
    row 35: p7, p2tog through the back, p9, p2tog, p7
    row 36: K6, k2tog, k9, k2tog through the back, k6 (23 stitches)
    row 37: purl
    work 8 rows
    row 46: with right side facing change colour for toe cap (see photo step 5) and work 2 rows

    row 48: K3, K2tog through the back, k4, k2tog, k1, k2tog through the back, k4, k2tog, k3
    row 49: purl
    row 50: K3, K2tog through the back, k2, k2tog, k1, k2tog through the back, k2, k2tog, k3 (15 stitches) (see photo step 6)

    row 51: purl
    Making Up:
    Cut work from the ball leaving a long end for sewing up. Thread end through 15 stitches on needle (see photo step 7) and pull up tight.

    Join seam running up bottom and back of stocking using mattress stitch (see photo step 8).

    Turn inside out and tie up all ends securely and trim - no need to sew them in. Turn right side out.
    Hanging loop: cast on 35 stitches and then cast them off. Double strip over to make a loop and sew to back of stocking. Secure with a cute button.


  9. #19
    L'avatar di Lo Staff
    Lo Staff è offline Moderatrice
    Data Registrazione
    11-12-2011
    Messaggi
    17,463
    Grazie
    0
    Ringraziato 14,979 volte in 6,543 Discussioni

    Predefinito


    decorazione con lana e bottoni.....
    http://www.pourfemme.it/foto/decoraz...o-di-natale/2/


    http://www.finecraftguild.com/how-to...ree-ornaments/ sul sito trovate i tutorial per realizzarli, in inglese...
    Ultima modifica di mammagiulietta; 09-07-2012 alle 22:24 Motivo: aggiunta foto precedentemente tolta dall'utente

  10. #20
    L'avatar di Lo Staff
    Lo Staff è offline Moderatrice
    Data Registrazione
    11-12-2011
    Messaggi
    17,463
    Grazie
    0
    Ringraziato 14,979 volte in 6,543 Discussioni

    Predefinito

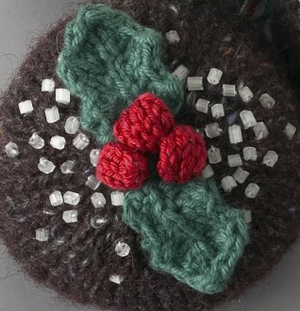
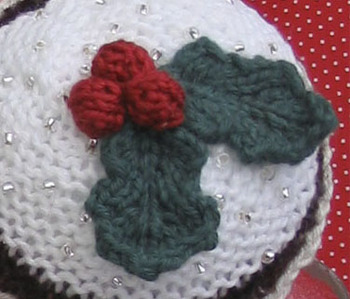
    Free knitting patterns: knitted holly


    Holly:
    Using 2.25mm needles and 4ply yarn cast on 3 stitches
    Row 1: Purl
    Row 2: K1, YFON, K1, YFON, K1 (5 stitches)
    Row 3: P1, twist a*, YFON, P1, YFON, P2 (7 stitches)
    Row 4: K2, twist b**, YFON, K1, YFON, K into back of next stitch, K2 (9 stitches)
    Row 5: P3, twist a*, P5 (9 stitches)
    Row 6: K2tog through the back, K5, K2tog (7 stitches)
    Row 7: P2tog, p3, P2together through the back (5 stitches)
    Row 8: K2, YFON, K1, YFON, K2 (7 stitches)
    Row 9: P2, twist a*, YFON, P1, YFON, P3 (9 stitches)
    Row 10: K3, twist b**, K1, K into back of next stitch, K3 (9 stitches)
    Row 11: P2tog, P5, P2together through the back (7 stitches)
    Row 12: K2tog through the back, K3, K2 tog (5 stitches)
    Row 13: P2tog, P1, P2tog through the back (3 stitches)
    Row 14: K1, K2 together pass first stitch over, pull end through to cast off
    Abbreviations:
    YFON = Yarn forward over needle - makes an extra stitch. Start with the working yarn at the back of the work, bring it over the right hand needle to the front and back under the right hand needle again to the back so making a loop.
    * twist a = insert right hand needle into the back of the made stitch purlwise, slip onto the righthand needle and slip back onto the lefthand needle so that what was the back of stitch becomes the front. Purl into back of this stitch)
    ** twist b = insert right hand needle into the front of the made stitch knitwise, slip onto the righthand needle and slip back onto the lefthand needle so the back of stitch becomes the front. Knit this stitch )

    To make the berries:
    Using 2.25mm needles and red 4ply yarn, Cast on 3
    Row 1: P3
    Row 2: K1, YO, K1, YO, K1 (5 stitches)
    Row 3: P5
    Row 4: K5
    Row 5:P5
    Row 6: K2tog through the back, K1, K2tog (3 stitches)
    Row 7: Slip 1, P2 tog through the back pass slip stitch over, thread end through to cast off
    Tie both cast on and cast off ends together and use one end to sew base together and make a small ball
    Making up
    Sew 2 leaves together at a slight angle, position desired number of berries in centre and sew in place.

Pagina 2 di 4 PrimaPrima 1234 UltimaUltima

Discussioni Simili

  1. Foto "sal lizzie kate decorazioni di natale"
    Di mindcreativity nel forum Foto SAL
    Risposte: 53
    Ultimo Messaggio: 18-12-2013, 07:42
  2. Decorazioni albero di Natale
    Di tulla nel forum Punto Croce
    Risposte: 6
    Ultimo Messaggio: 02-10-2013, 10:35
  3. Categoria Decorazioni Albero Natale
    Di Amministratore nel forum Punto Croce
    Risposte: 4
    Ultimo Messaggio: 22-11-2008, 19:02
  4. decorazioni di natale
    Di fiorella nel forum Ricami Punto Croce
    Risposte: 19
    Ultimo Messaggio: 16-11-2008, 22:26

Segnalibri

Segnalibri

Permessi di Scrittura

  • Tu non puoi inviare nuove discussioni
  • Tu non puoi inviare risposte
  • Tu non puoi inviare allegati
  • Tu non puoi modificare i tuoi messaggi
  •